Search...
Overview

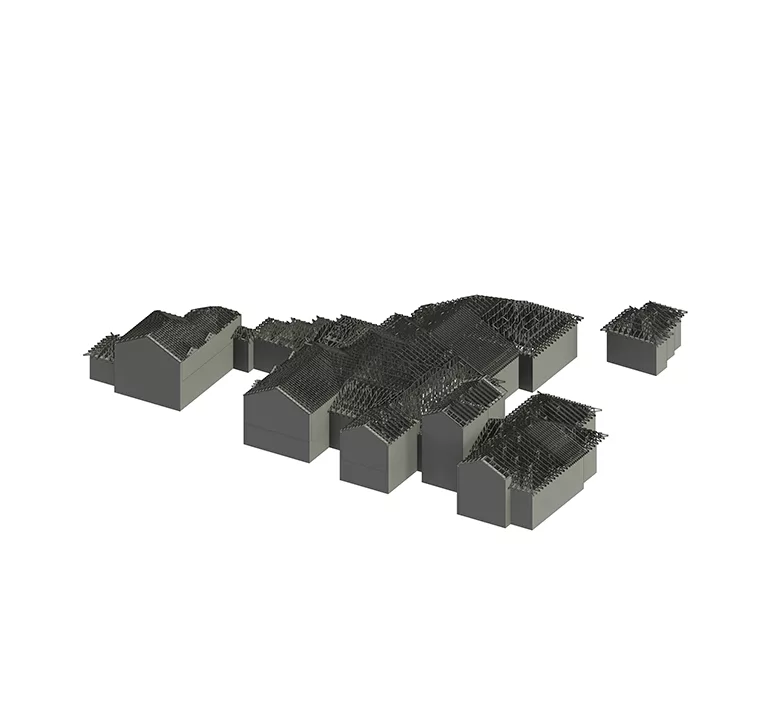
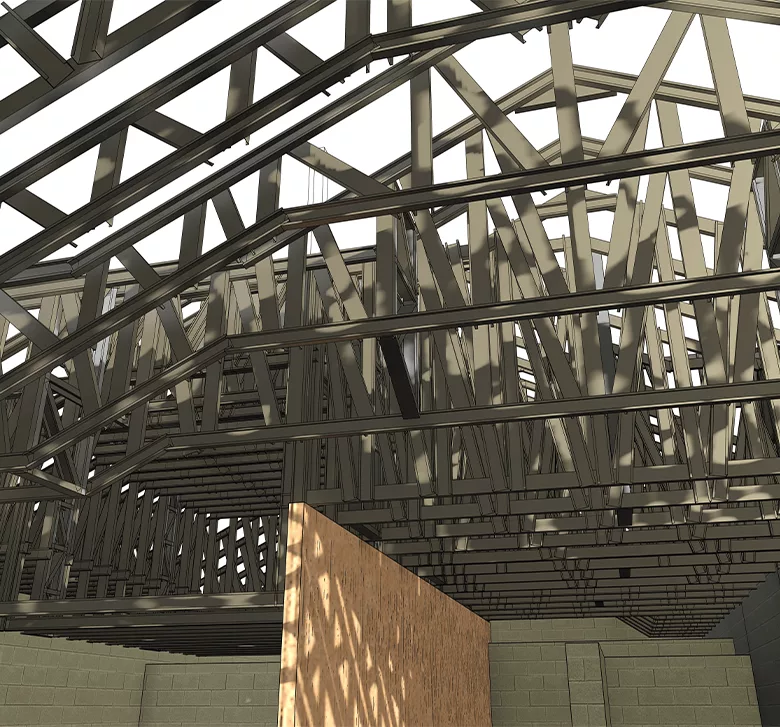
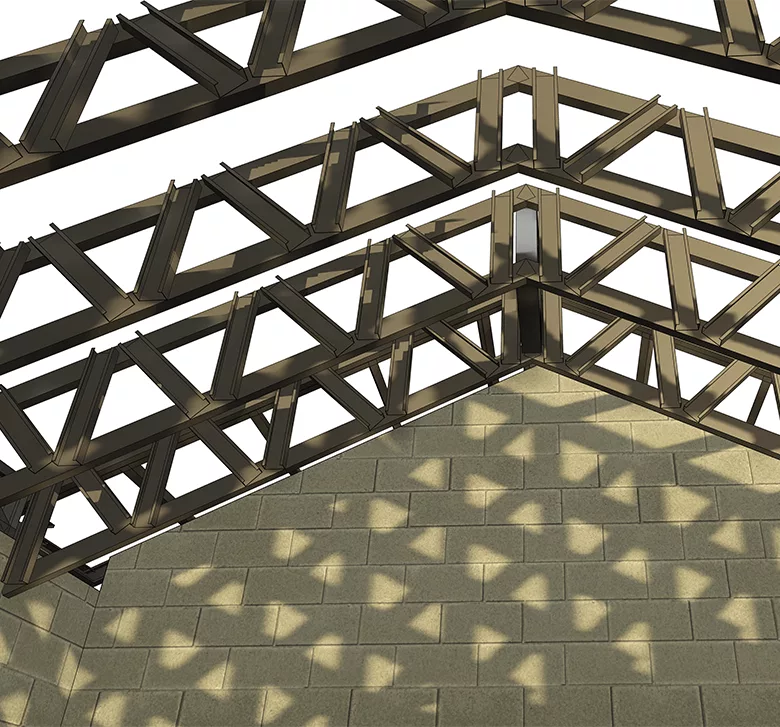
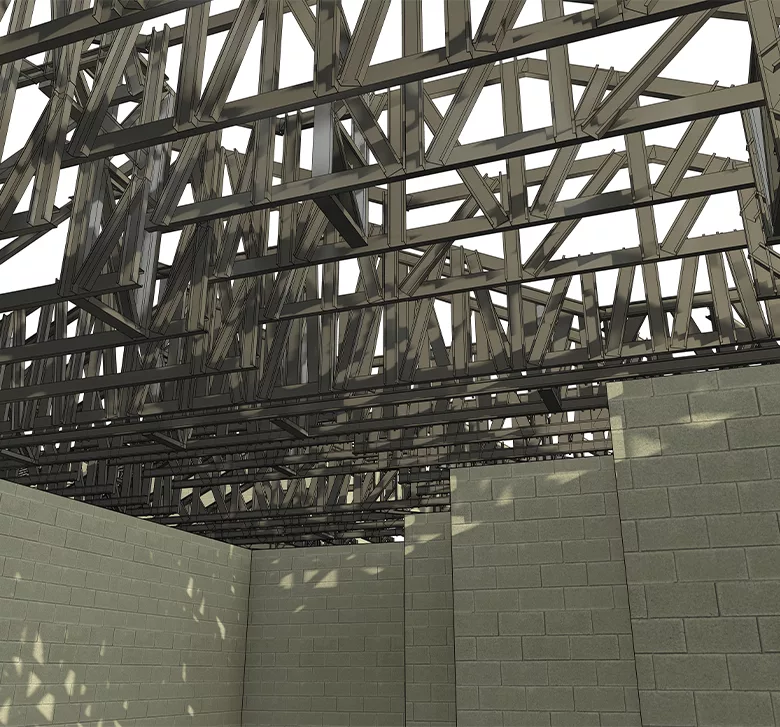
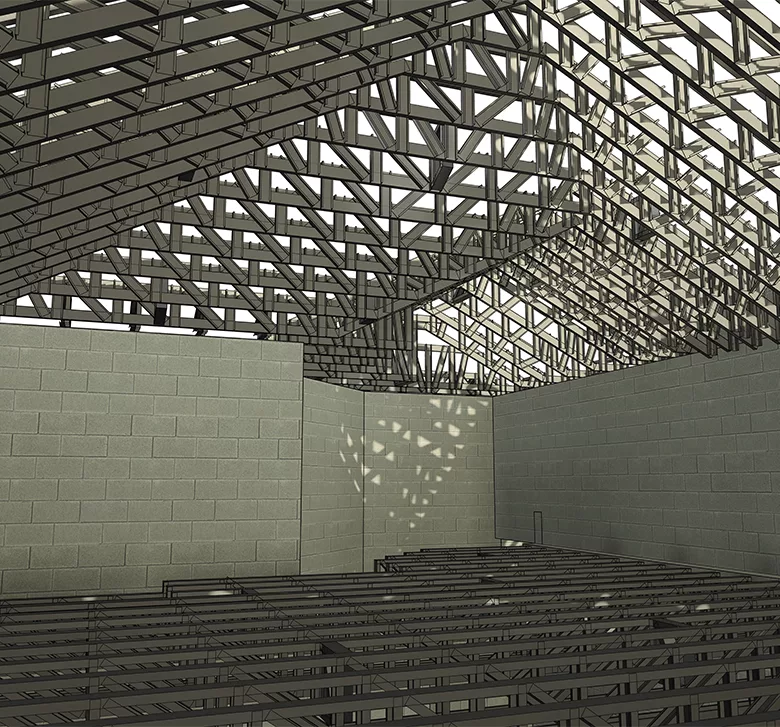
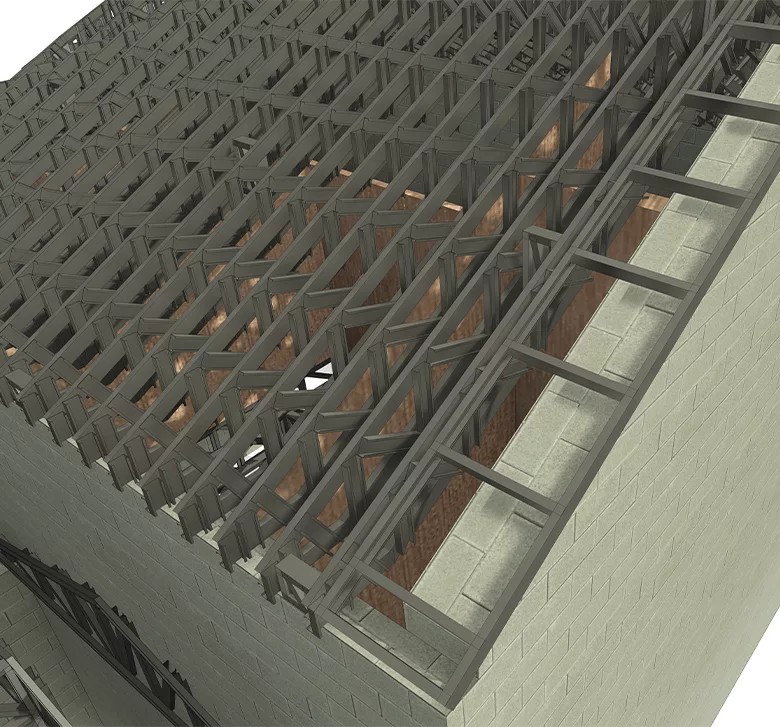
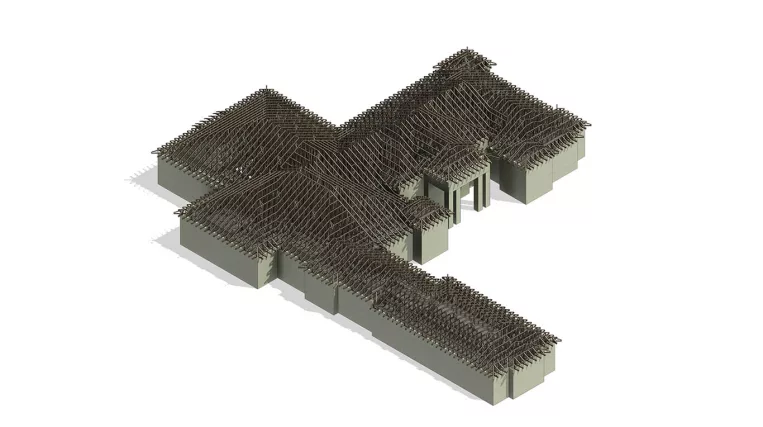
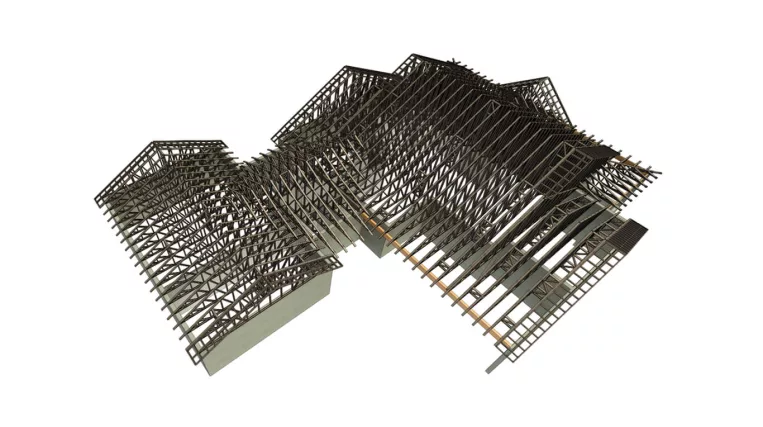
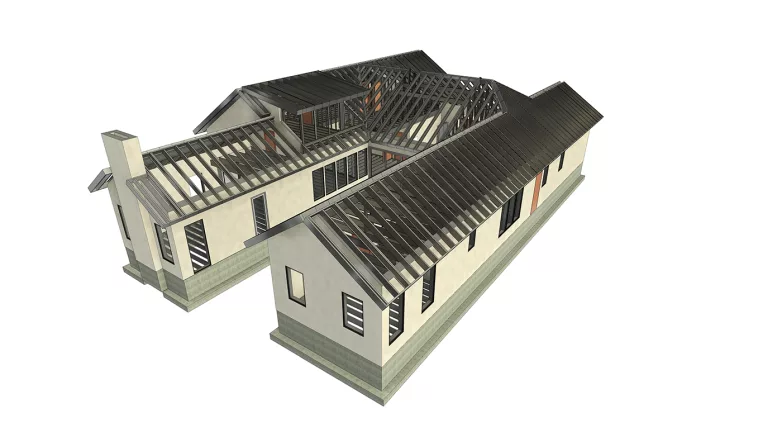
In this project, the ORIGIN team was committed to designing the LGS roof framing for a residential building.

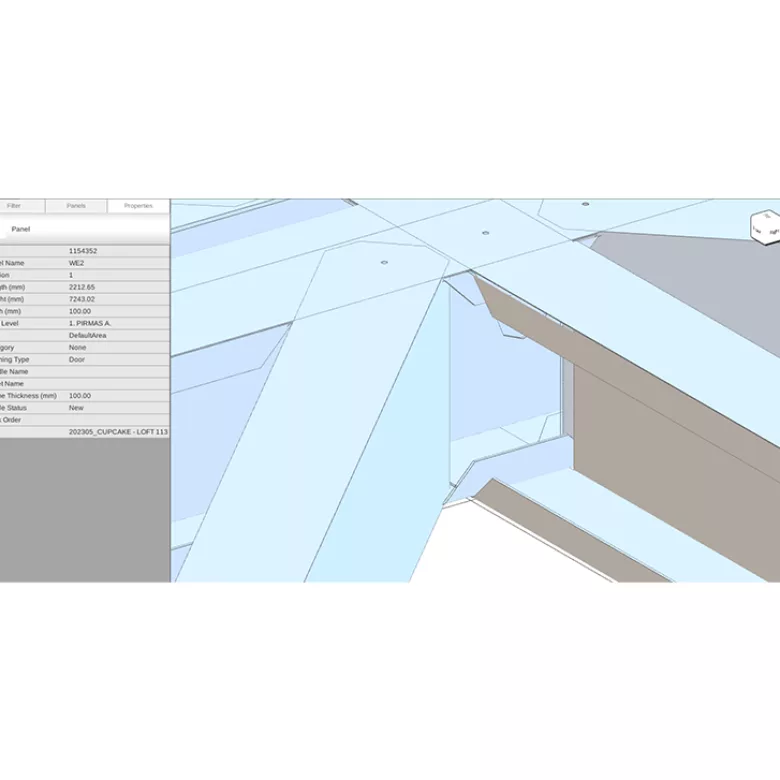
One of the most crucial requirements was to ensure compatibility of the truss design with the FRAMECAD rollformer system.


Input: Structural drawing set.

Project Deliverables:

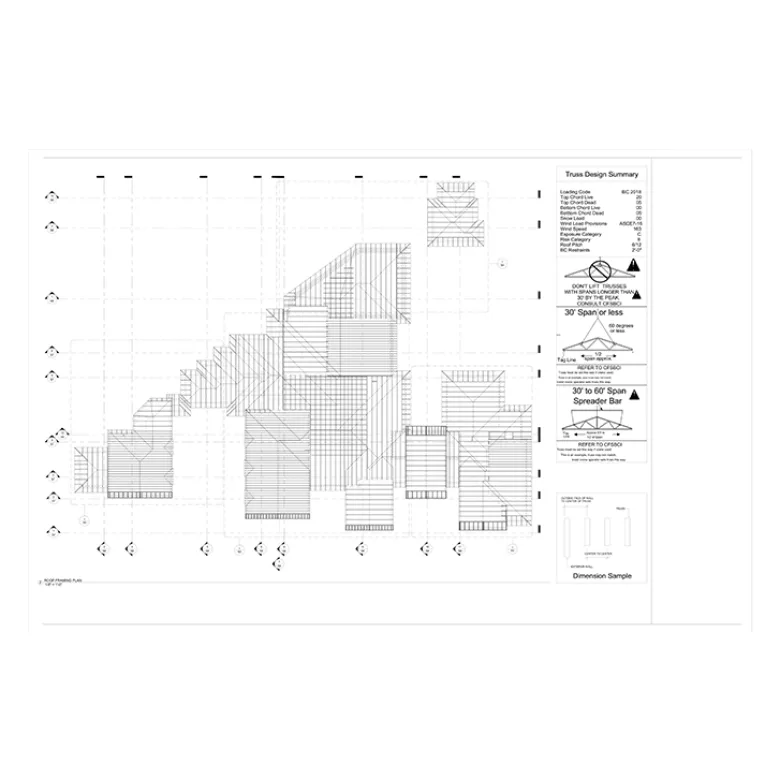
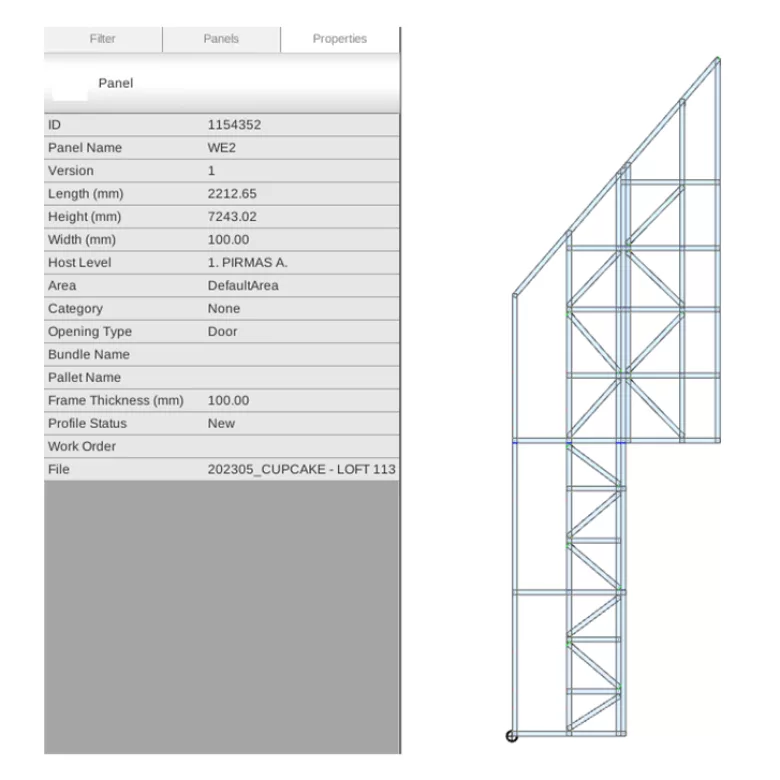
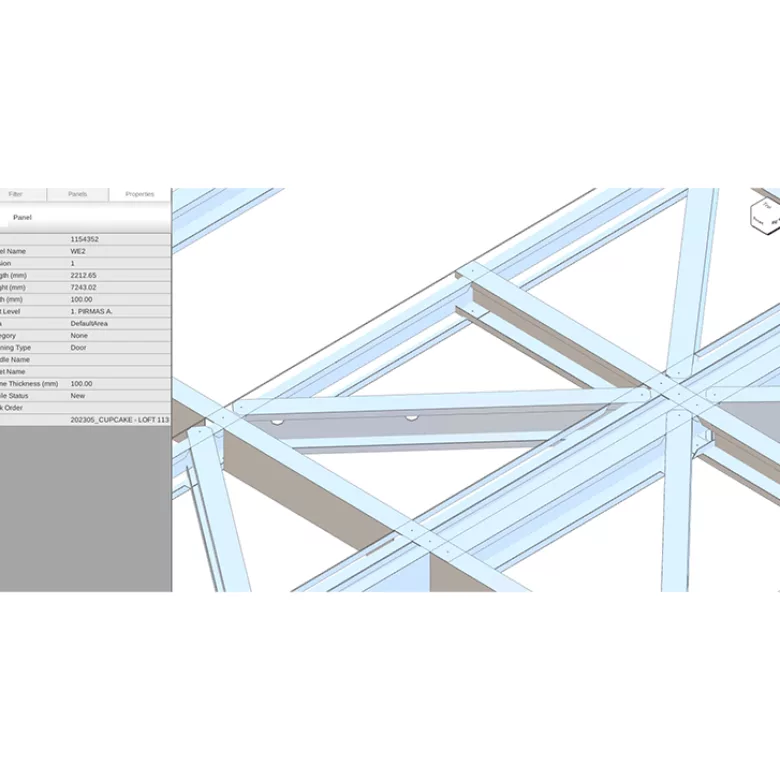
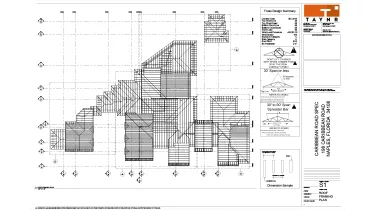
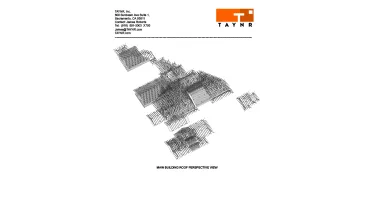
  • Roof trusses layout;
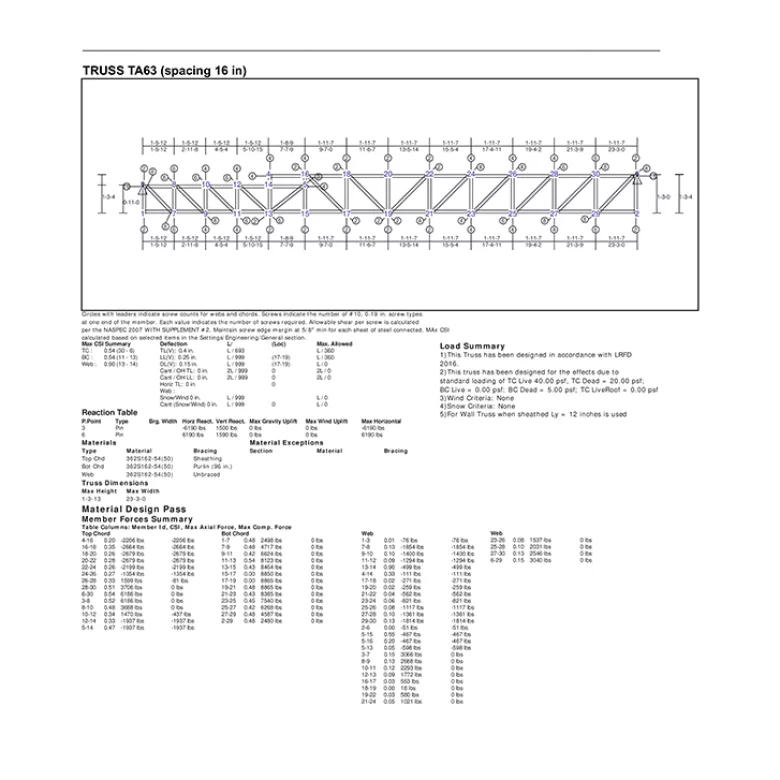
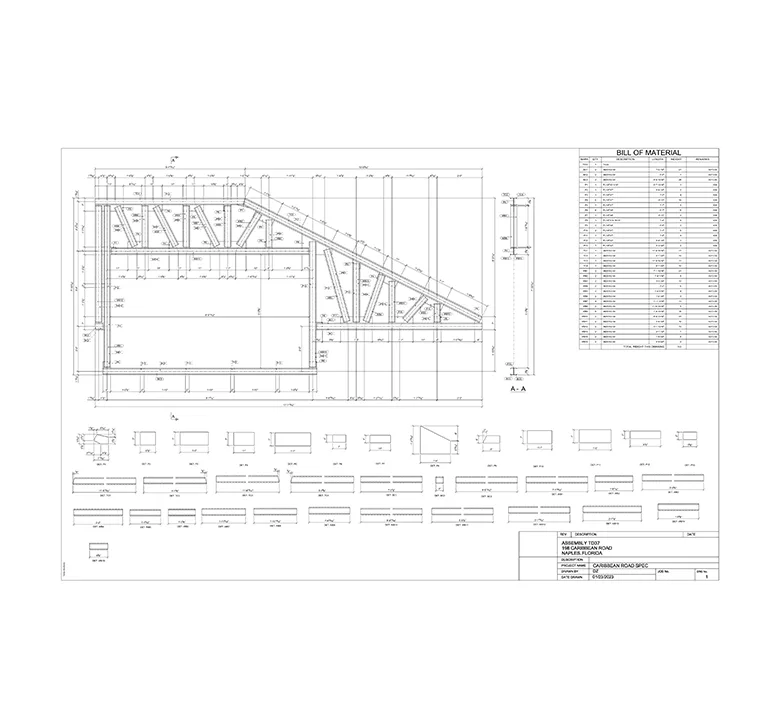
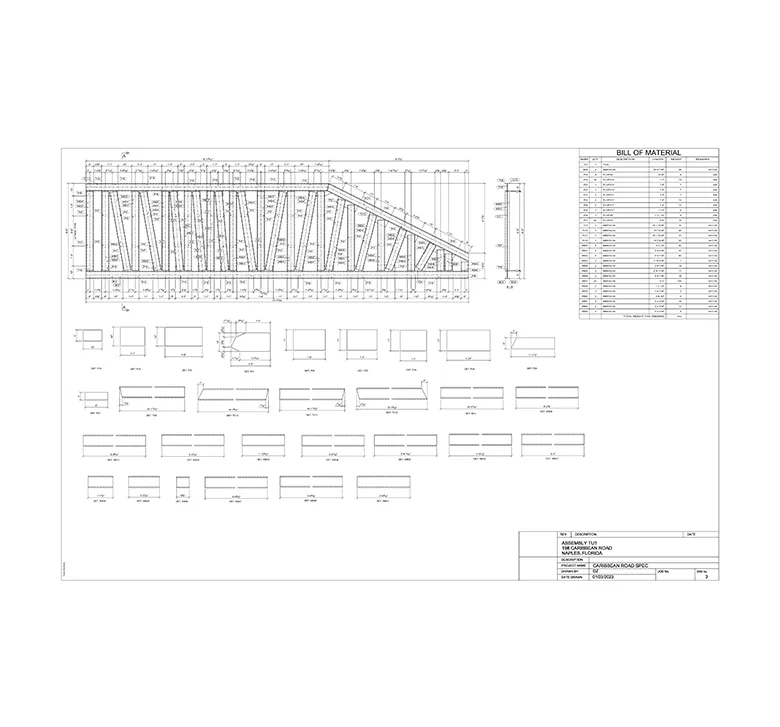
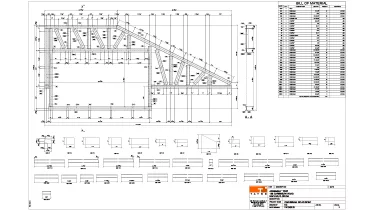
  • Truss reports;
  • Shop drawings for complex LGS trusses incompatible with the FRAMECAD system;
  • FRAMECAD CNC files for LGS panels production.
Services: STRUCTURE
Subservices: Light gauge steel design and detailing
Industry: Residential
Object type: Single-family home
Area: 990 m² / 10660 ft²
Tools used: Autodesk Revit, Strucsoft MWF Advanced Metal, SCIA Engineer, Tekla Tedds
Share:
Project stages
1. LGS Truss Modeling
2. LGS Truss Layout Drawings and Reports
3. Complex LGS Truss Shop Drawings
4. LGS CNC Export
Code/Authority List:
  • 2022 California Residential Code (CRC);
  • 2022 California Building Code (CBC);
  • ASCE 7-16: Minimum design loads and associated criteria for buildings and other structures.
1
1
1
1
1
1
1

Step 1 — LGS Truss Modeling

The project began with crafting a Revit model of the roof.

In doing so, we thoroughly examined the architectural plans to create a precise model that we would later use for LGS framing. Whenever we noticed any discrepancies, we added them to RFIs and passed them on to the architect for further feedback. Once all issues were resolved, we moved on to the next step of the process, LGS framing.

To automate LGS framing creation, we used StrucSoft MWF Advanced Metal, a robust Revit add-in solution. It saved us a considerable amount of time that would otherwise be spent on unnecessary operations, all while guaranteeing accurate results.

Step 2 — LGS Truss Layout Drawings and Reports

At this stage, we focused on truss layout plans and generated individual truss reports. StrucSoft MWF Advanced Metal performed automatic truss calculations, which we then verified. Each report contained all the necessary information as required by the codes.

1
1
1
1
1
1
1
1
1
1

Step 3 — Complex LGS Truss Shop Drawings

Next, we had to address the areas of the building with large spans that regular LGS trusses couldn’t accommodate, at least not without utilizing double channels and gussets.

For these trusses, we created shop drawings using Tekla Structures software, which speeded up the drawing issuance process and successfully provided steel detailing for all gusset plates.

Step 4 — LGS CNC Export

As the final step, we got everything ready for producing the LGS panels.

We exported a CNC file from the Revit model, making them ready to load into the FRAMECAD rollformer. Following this, the truss assembly process started, guided by truss reports displaying diagrams for each truss.

1
1
1
1
Drawings

Click on preview to view high resolution PDF drawings

Benefits
The precise alignment of LGS framing with the geometry of the building, eliminating potential installation issues on-site
The ability to utilize the BIM model of LGS framing for clash detection with other trades
Colossal manufacturing time savings thanks to the CNC export of LGS panels and utilization of CNC rollformers for LSG panel production
Tools used
1
Autodesk Revit
1
Strucsoft MWF Advanced Metal
1
SCIA Engineer
1
Tekla Tedds
view project view more view photos