Search...
Overview

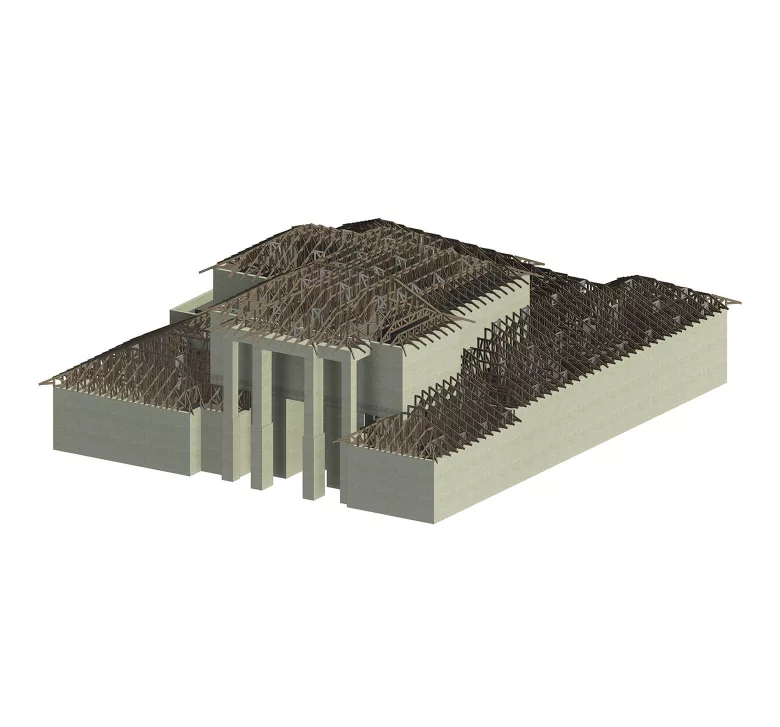
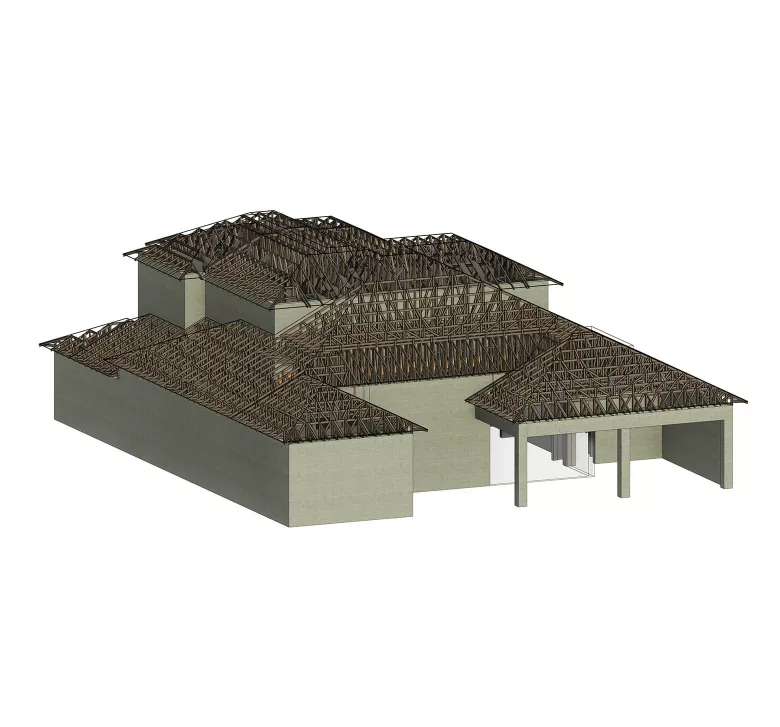
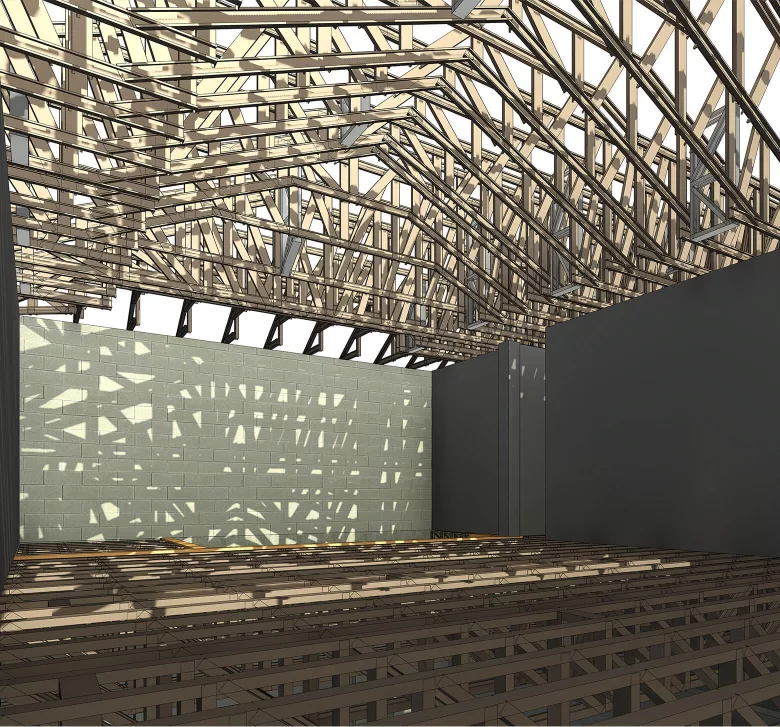
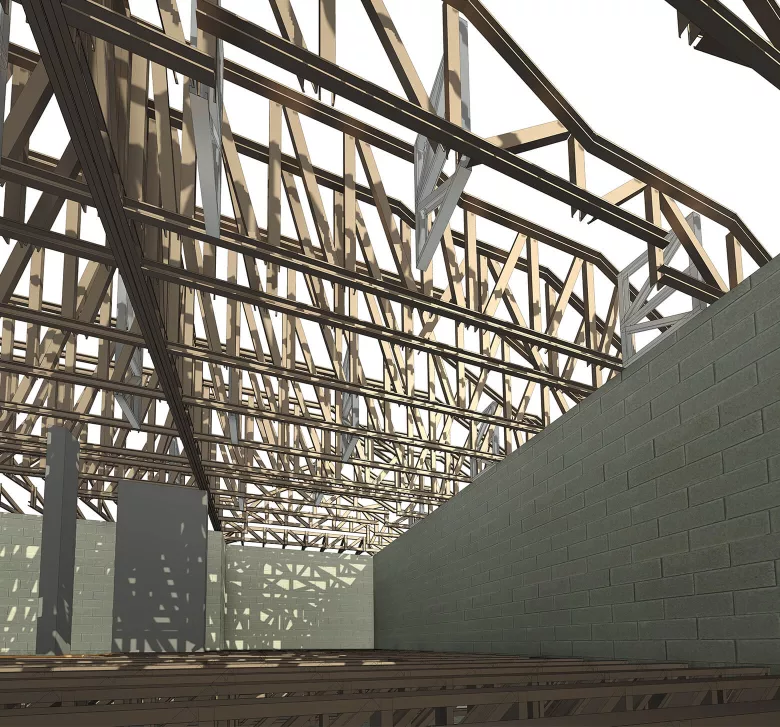
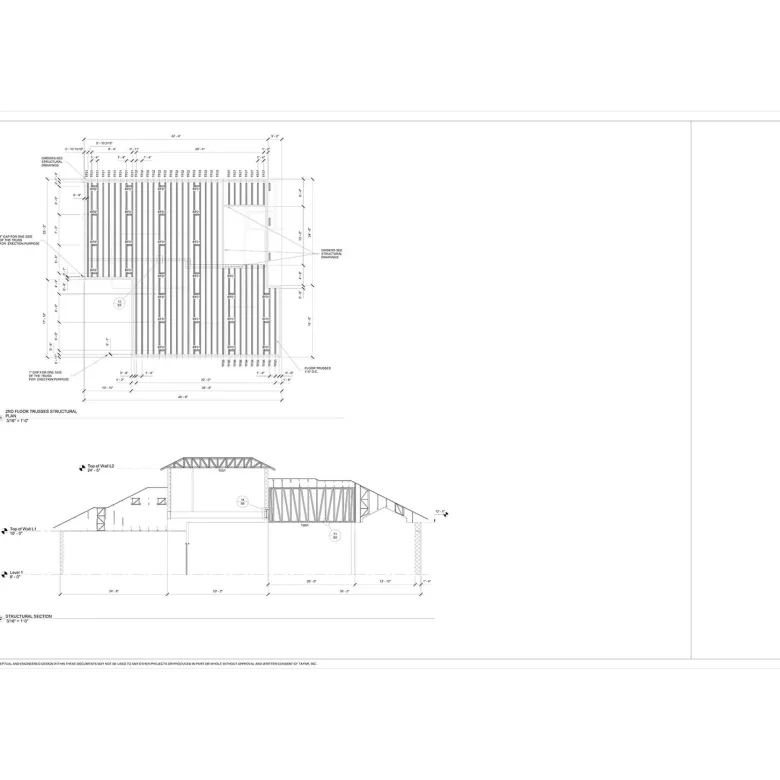
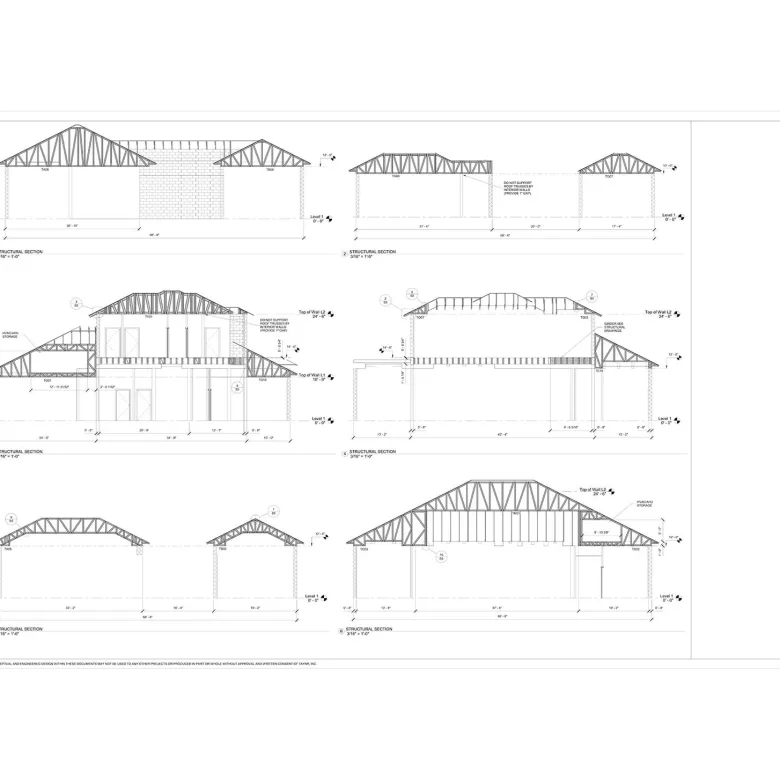
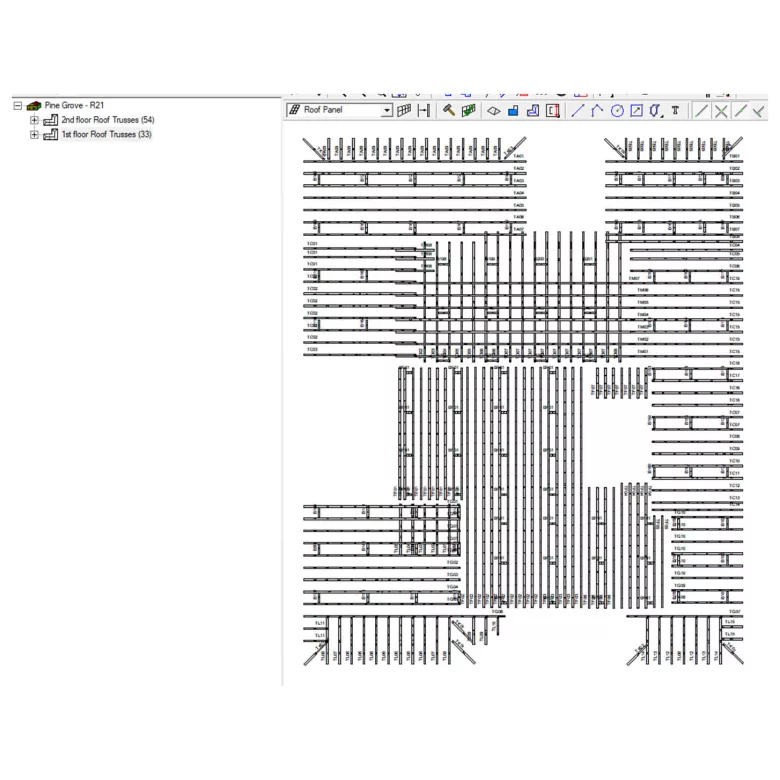
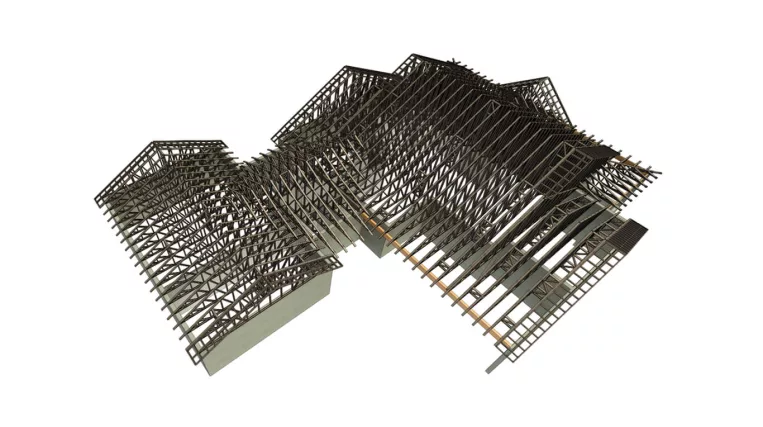
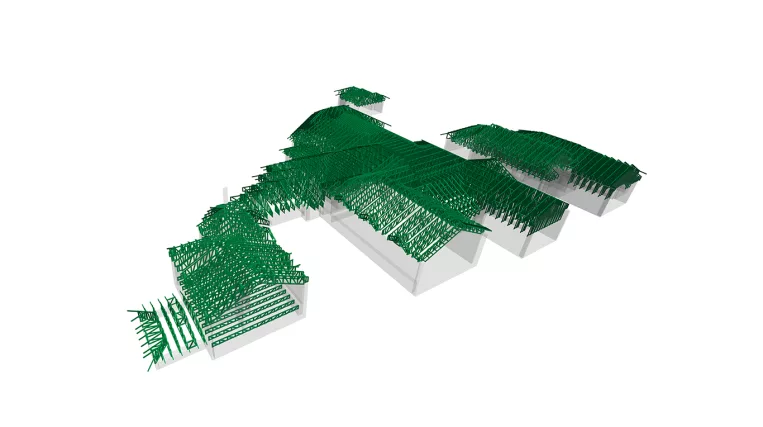
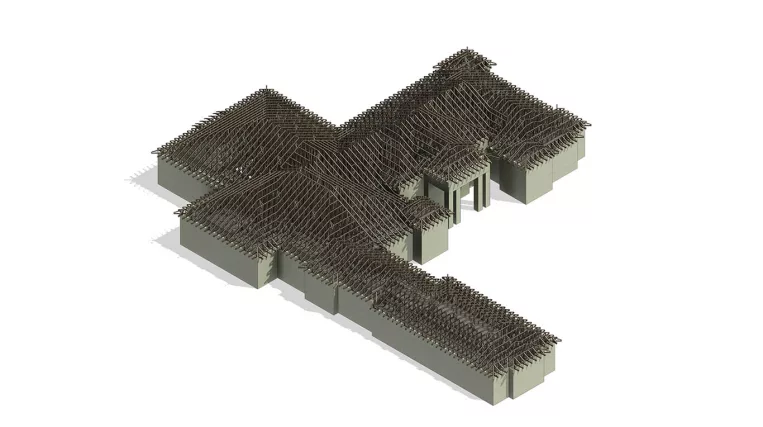
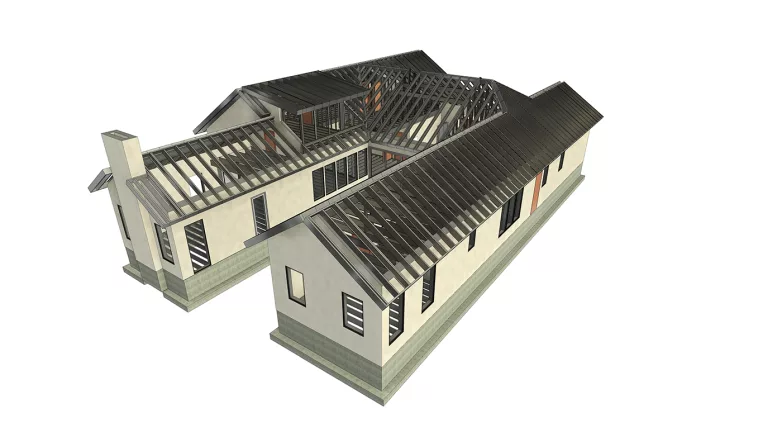
The goal of this project was to design LGS roof framing for a single-family residential house spanning 520 m² / 5600 ft² LGS framing.

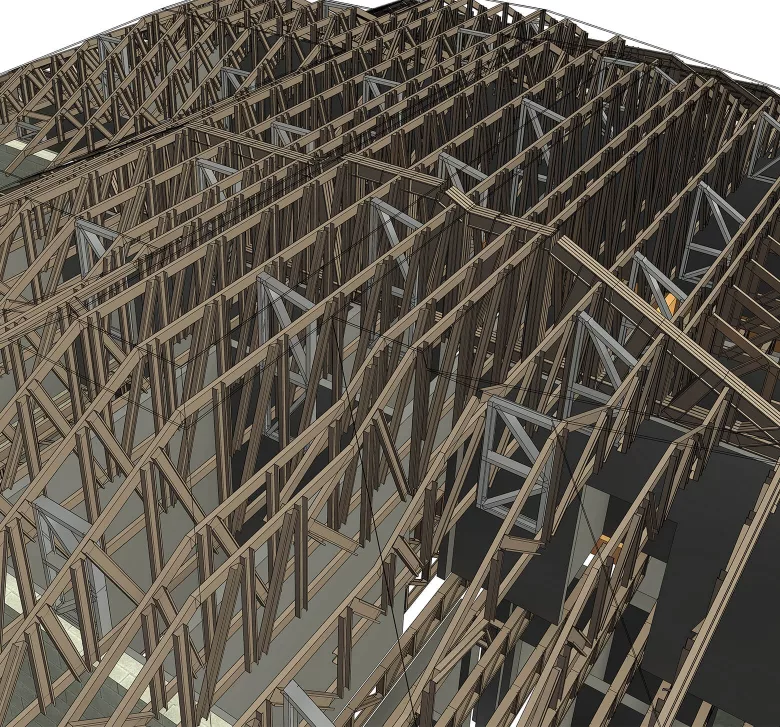
ORIGIN was asked to ensure the truss design was compatible with the FRAMECAD rollformer, enabling seamless fabrication and streamlined production. Well-versed with this technology, the ORIGIN team committed to efficient execution.


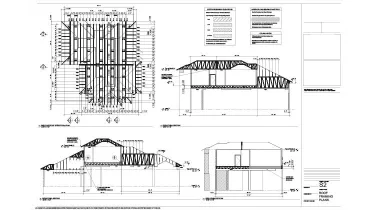
Input: Structural drawings set.

Project deliverables:

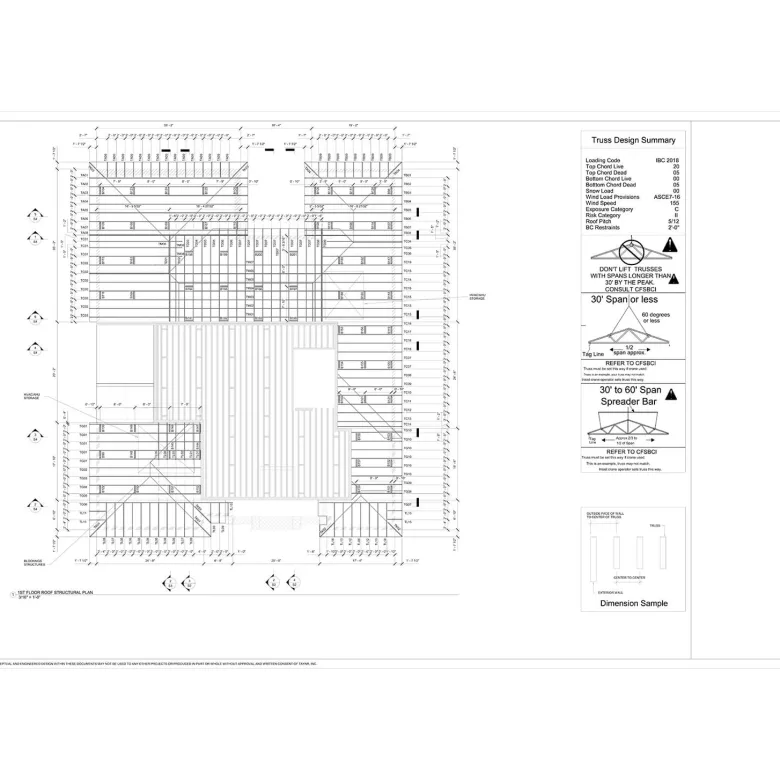
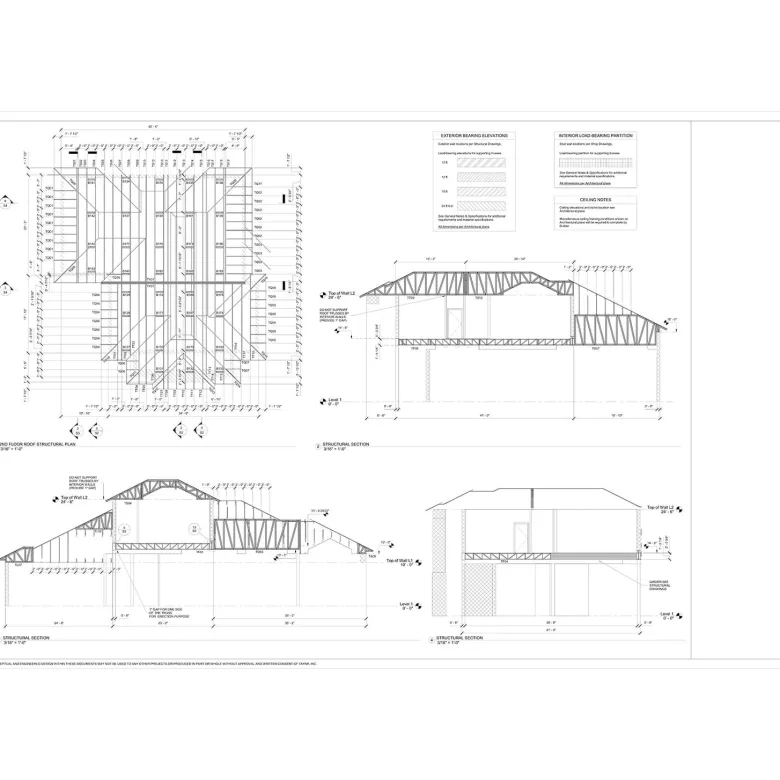
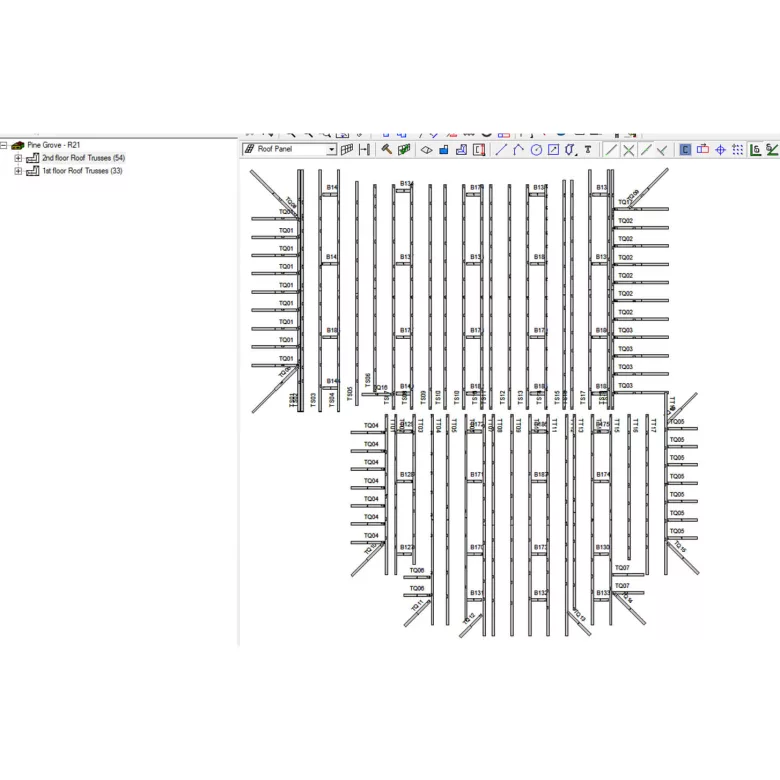
  • Roof trusses layout;
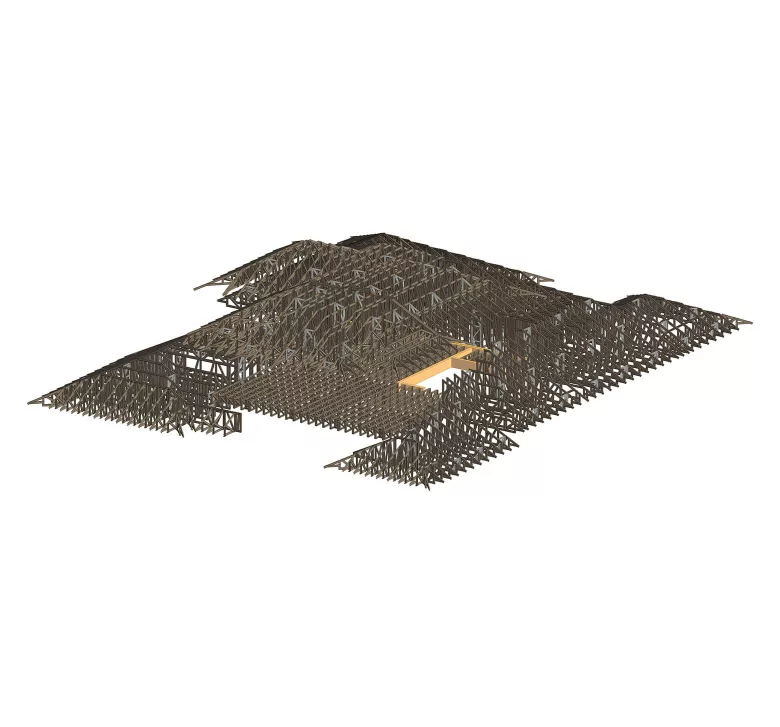
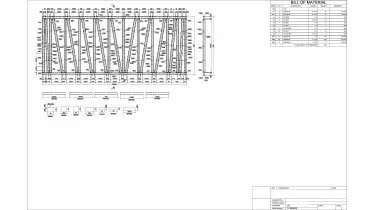
  • Truss reports;
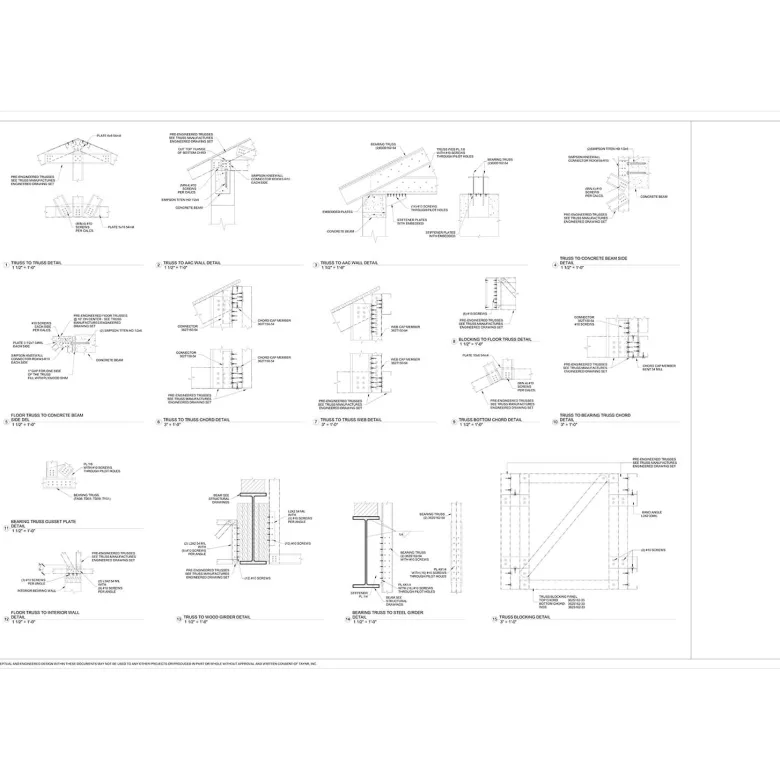
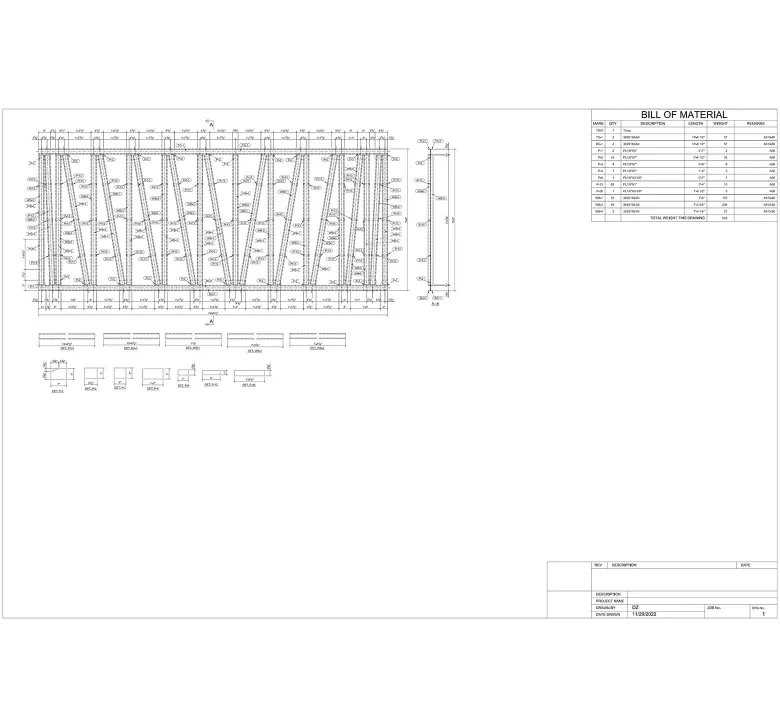
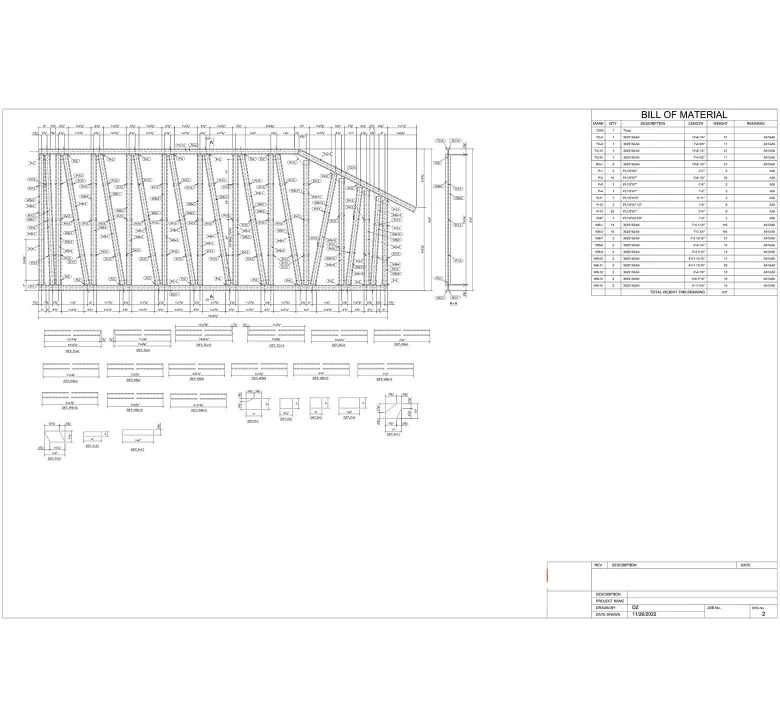
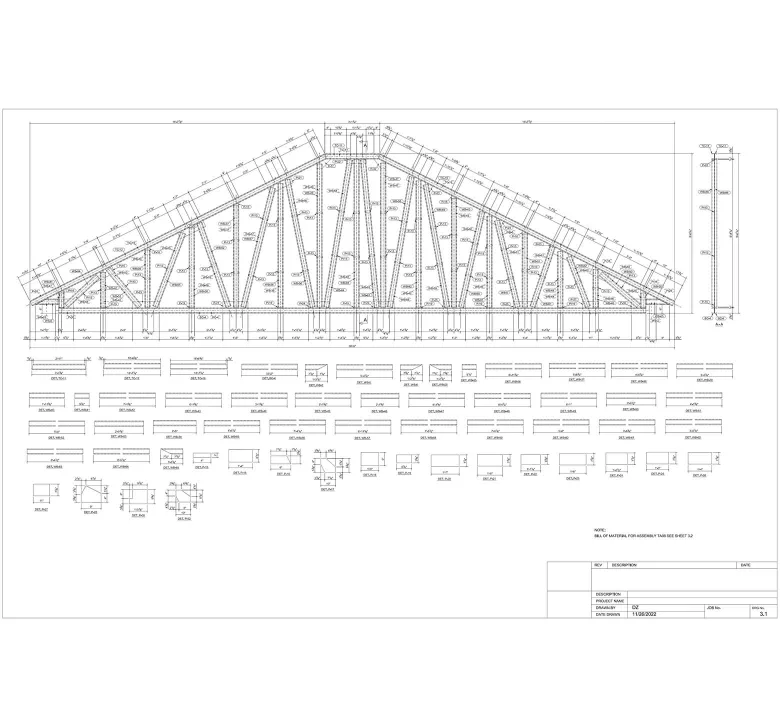
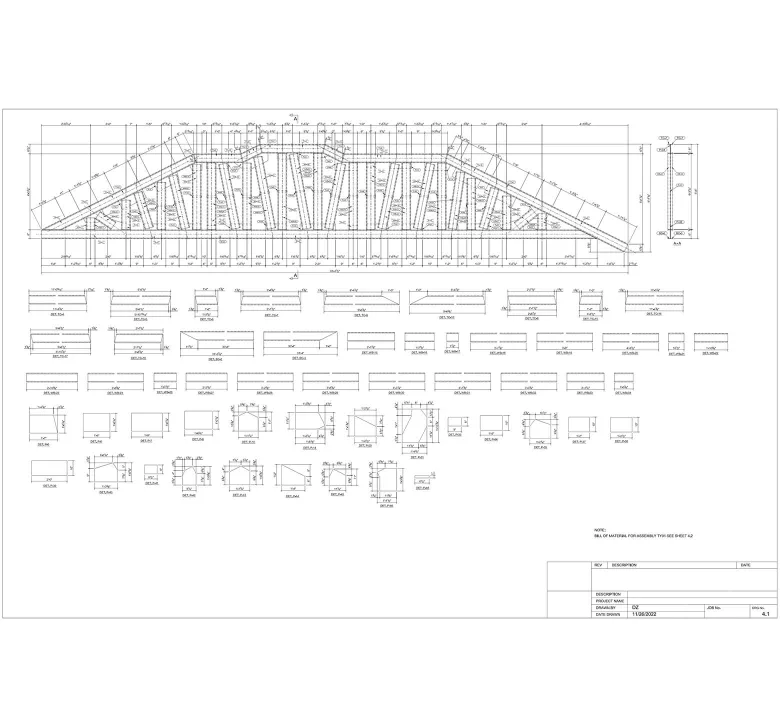
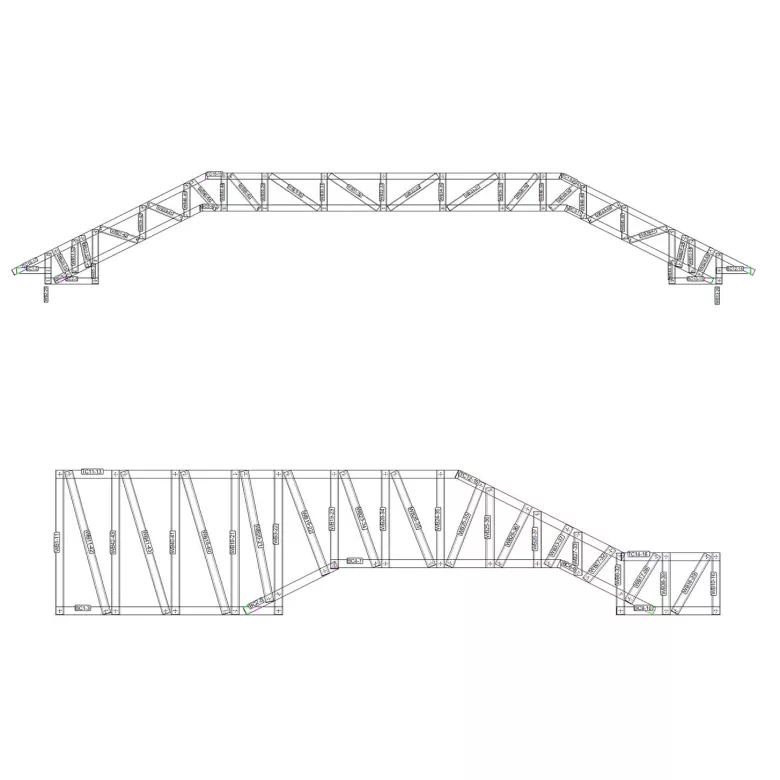
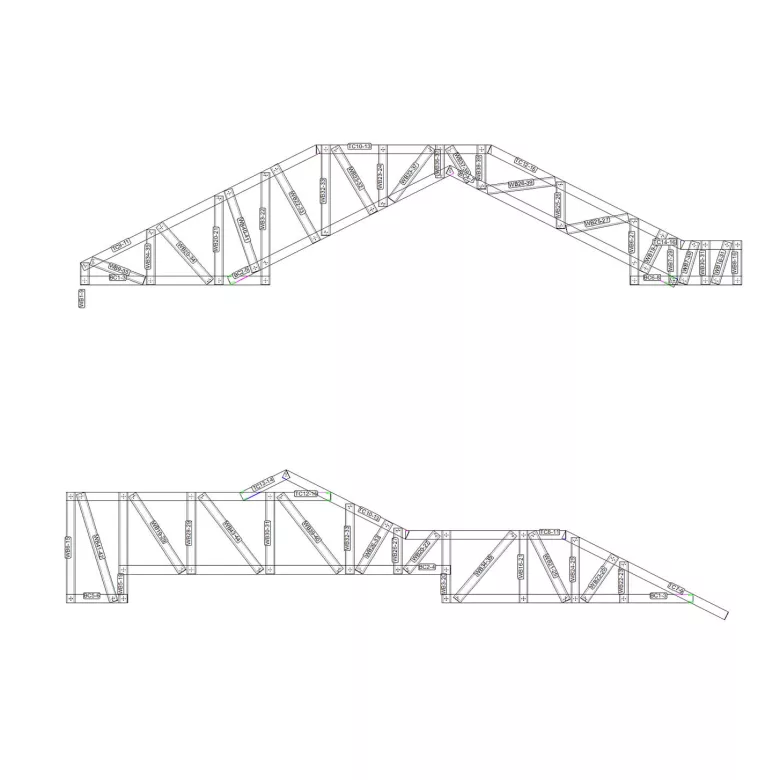
  • Shop drawings of complex LGS trusses which cannot be fabricated using FRAMECAD system only;
  • FRAMECAD CNC files for LGS panels production.
Services STRUCTURE
Subservices Light gauge steel design and detailing
Industry Residential
Object type Single-family home
Area 520 m² / 5600 ft²
Tools used Autodesk Revit, Strucsoft MWF Advanced Metal, SCIA Engineer, Tekla Tedds
Share:
Project stages
1. LGS truss modeling
2. LGS truss layout drawings and reports
3. Complex LGS truss shop drawings
4. LGS CNC export
Code/Authority List:
  •  2022 California Residential Code (CRC);
  •  2022 California Building Code (CBC);
  •  ASCE 7-16 minimum design loads and associated criteria for buildings and other structures.
1
1
1
1
1
1
1

Step 1 — LGS truss modeling

First, we needed to create a Revit model of only the roof itself.

To achieve this, we created an accurate Revit roof model based on the existing architectural drawings.

The utmost accuracy was crucial for us at this stage, as the LGS framing would be based on this model. Therefore, we diligently noted any discrepancies and created RFIs, submitting them to the architect for further clarification.

As soon as the roof modeling was complete and all clarifications resolved, we generated LGS framing. To streamline this process, we used the Strucsoft MWF Advanced Metal software, a Revit add-in containing numerous tools for automated LGS framing creation.

Step 2 — LGS truss layout drawings and reports

Next, we worked on truss layout plans.

At this step, we had to prepare the report for each individual truss. Nevertheless, we were able to vastly automate the process thanks to the built-in truss calculation feature in Strucsoft MWF Advanced Metal.

Since truss calculations were automated, all we had to do was verify for compliance.

Hence, we ensured each report met all the requirements mandated by the codes.

1
1
1
1
1
1
1
1
1

Step 3 — Complex LGS truss shop drawings

Some areas of the building had large spans that regular LGS trusses could not handle without doubling channels and using gussets. For such trusses, we created shop drawings using Tekla Structures. This not only sped up the process of issuing drawings but also provided steel detailing for all gusset plates.

Step 4 — LGS CNC export

Finally, we moved on to producing LGS panels.

We exported CNC files from the Revit model, which were then loaded into the FRAMECAD rollformer.

Truss assembly was conducted using truss reports, which showed a truss diagram.

1
1
1
1
Drawings

Click on preview to view high resolution PDF drawings

Benefits
The precise alignment of LGS framing with the geometry of the building, eliminating potential installation issues on-site
The ability to utilize the BIM model of LGS framing for clash detection with other trades
Colossal manufacturing time savings thanks to the CNC export of LGS panels and utilization of CNC rollformers for LSG panel production
Tools used
1
Autodesk Revit
1
Strucsoft MWF Advanced Metal
1
SCIA Engineer
1
Tekla Tedds
view project view more view photos